Pages

Freitag, 2. Mai 2014

The 18th Century Begére

Another straw hat!
From the second Cowboy hat I made a Begére hat. When I needed more straw for the 1840's bonnet I cut out the crown of the hat leaving a crown tip and a brim.
Since this is pretty much what a Begére needs it was a quick decision to be made.
I pressed both leftover pieces overnight and then attached the crown tip to the brim.

A very speedy hat project!


The original hat


A satin ribbon is attached in three locations.


The finished Begére


My first straw Project

Ever since I bought my hat patterns I wanted to try one in straw. But straw braid is expensive! So I bought four used straw Cowboy hats on ebay and opened up the seams of the first one. Since it was made using chain stitch that part was done in about one minute...

My first straw hat willactually be a straw bonnet. I chose a 1840s Bonnet Pattern from (guess it) Lynn McMasters.

Here is my process diary:

 This is the original hat. But not for long....


First step, as usual, was cutting the bonnet pattern from buckram. To have a smooth edge, I covered the outer edge with a muslin bias tape.

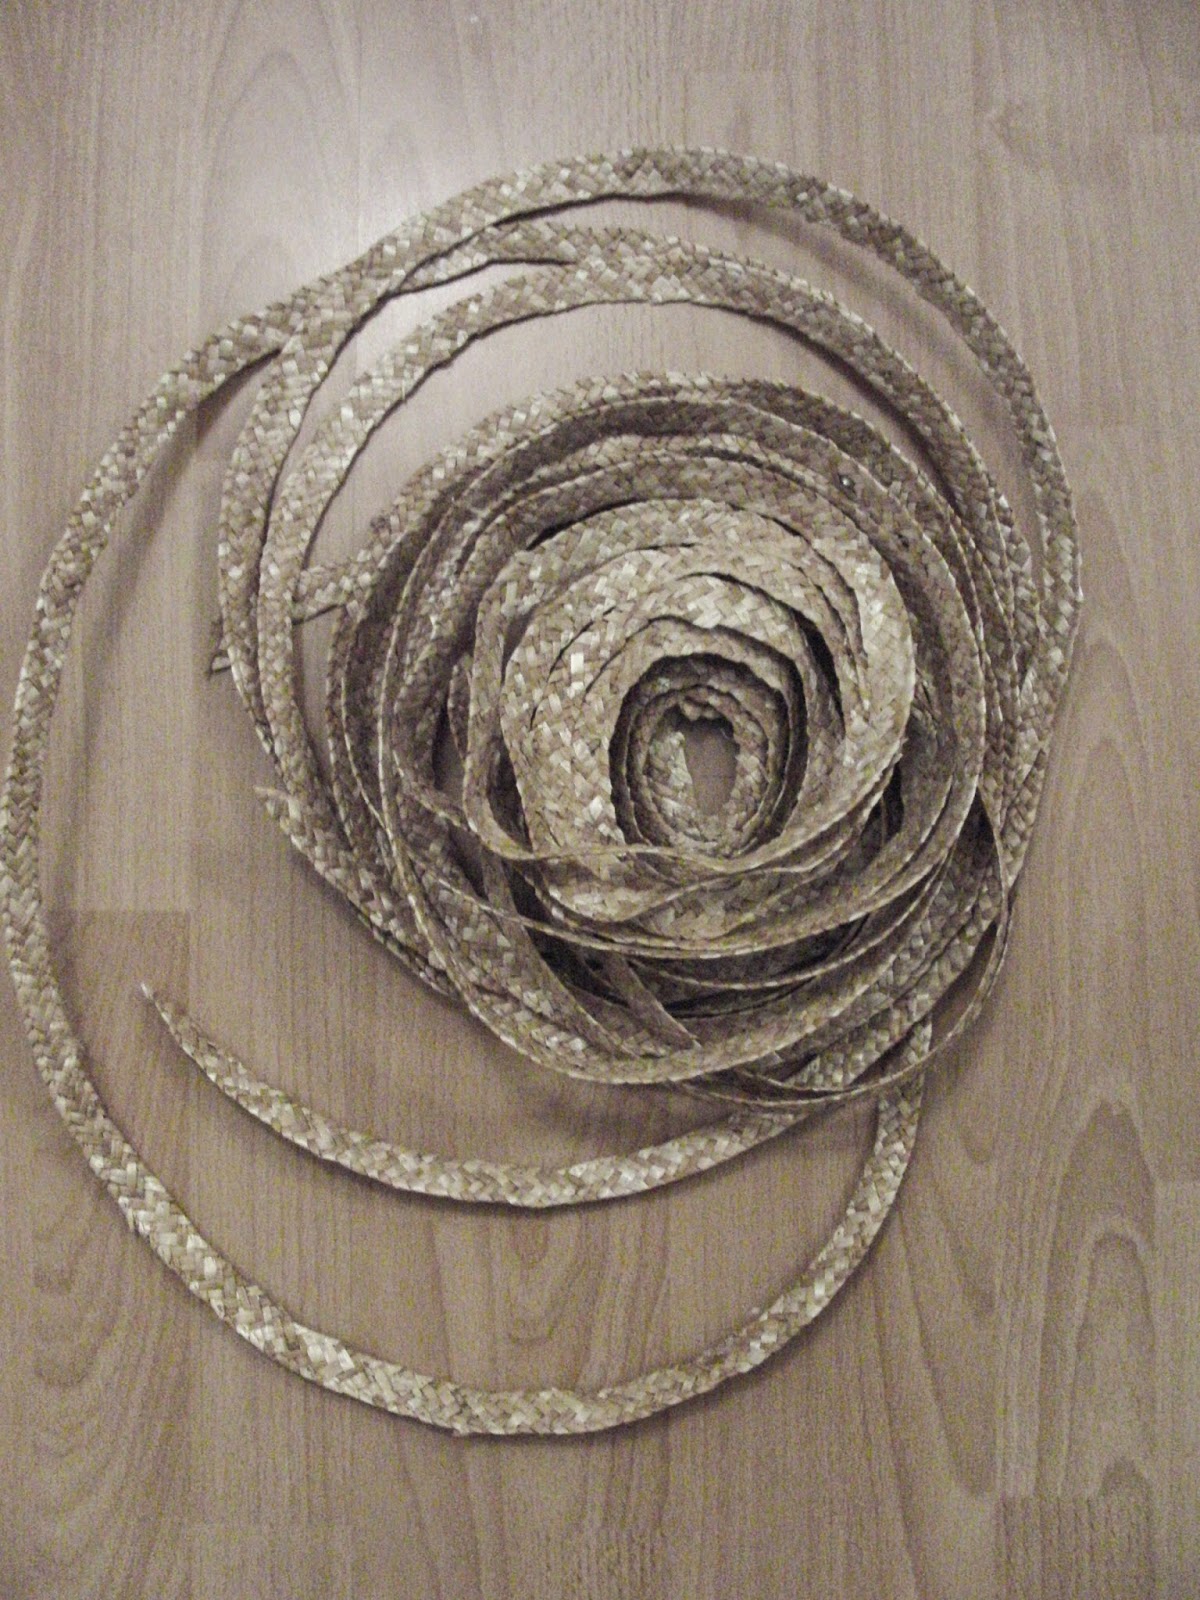
Then I ripped apart the old hat to get a long braid of straw.
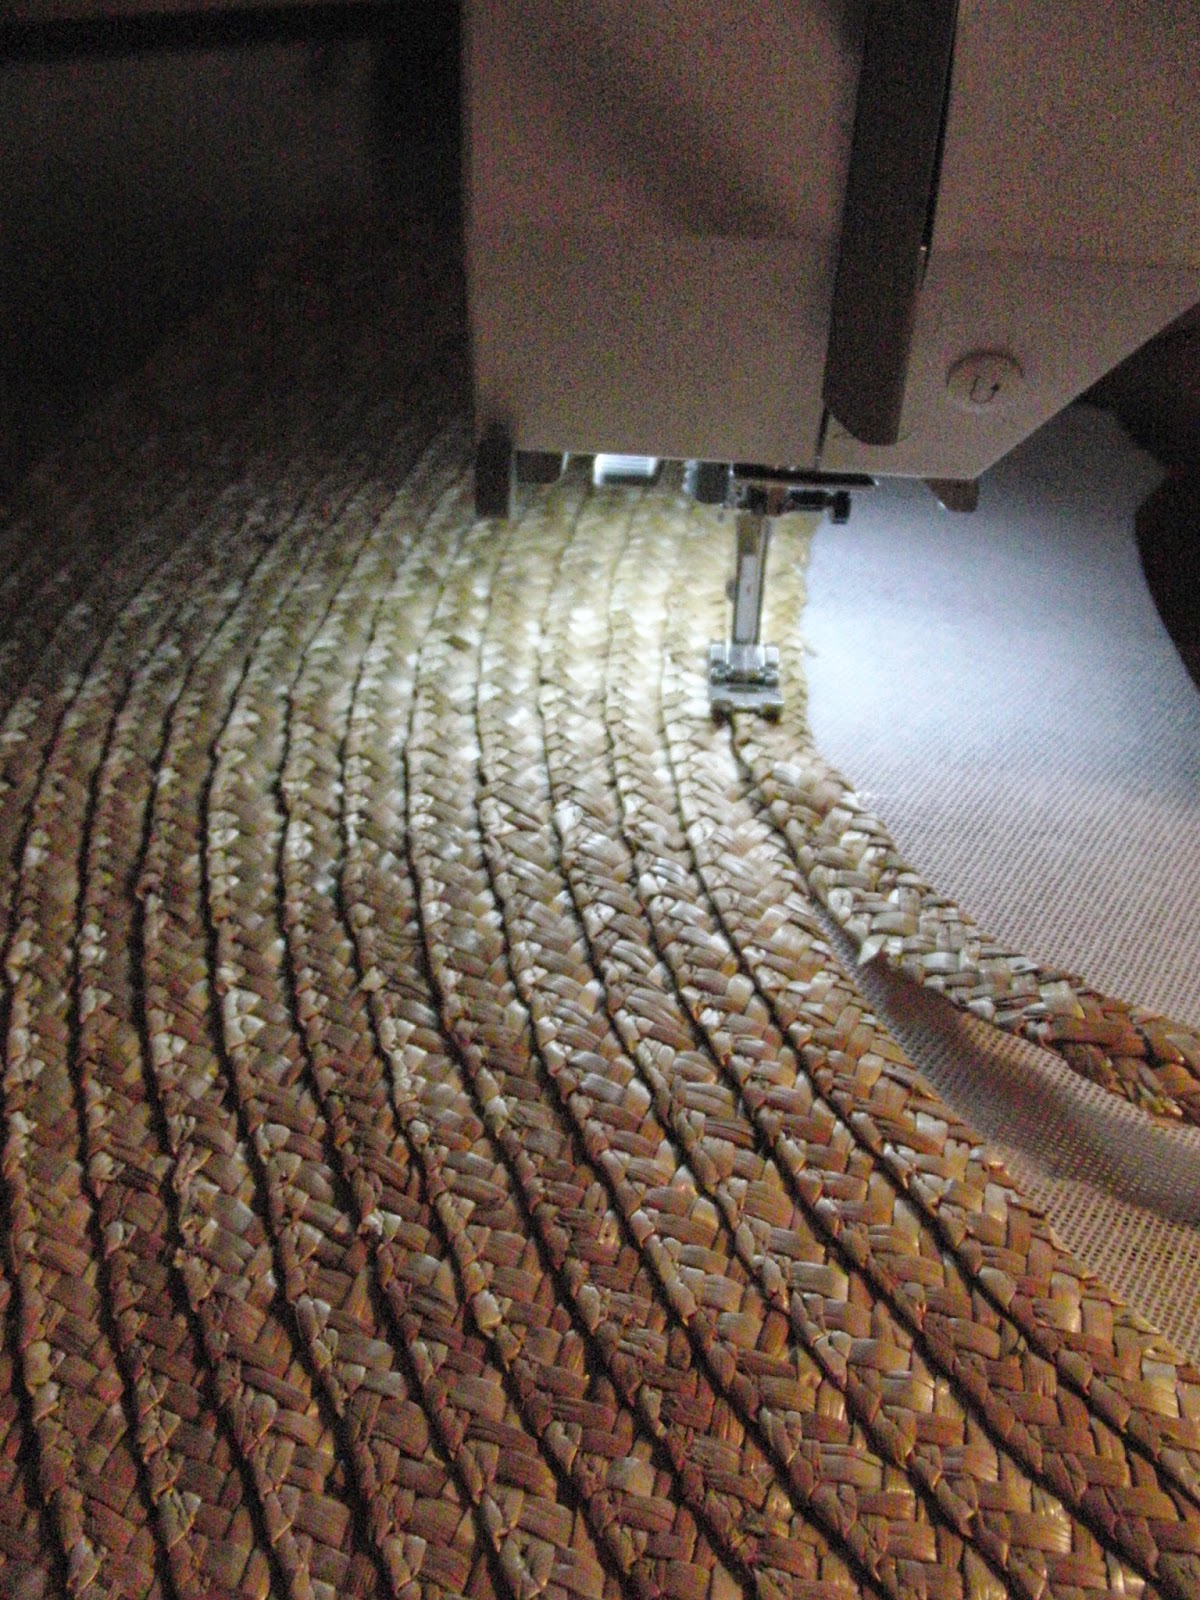
This braid is sewn on the buckram line by line. I am starting on the outside edge.
Since one hat wasn't enough I used some more straw from a second hat..


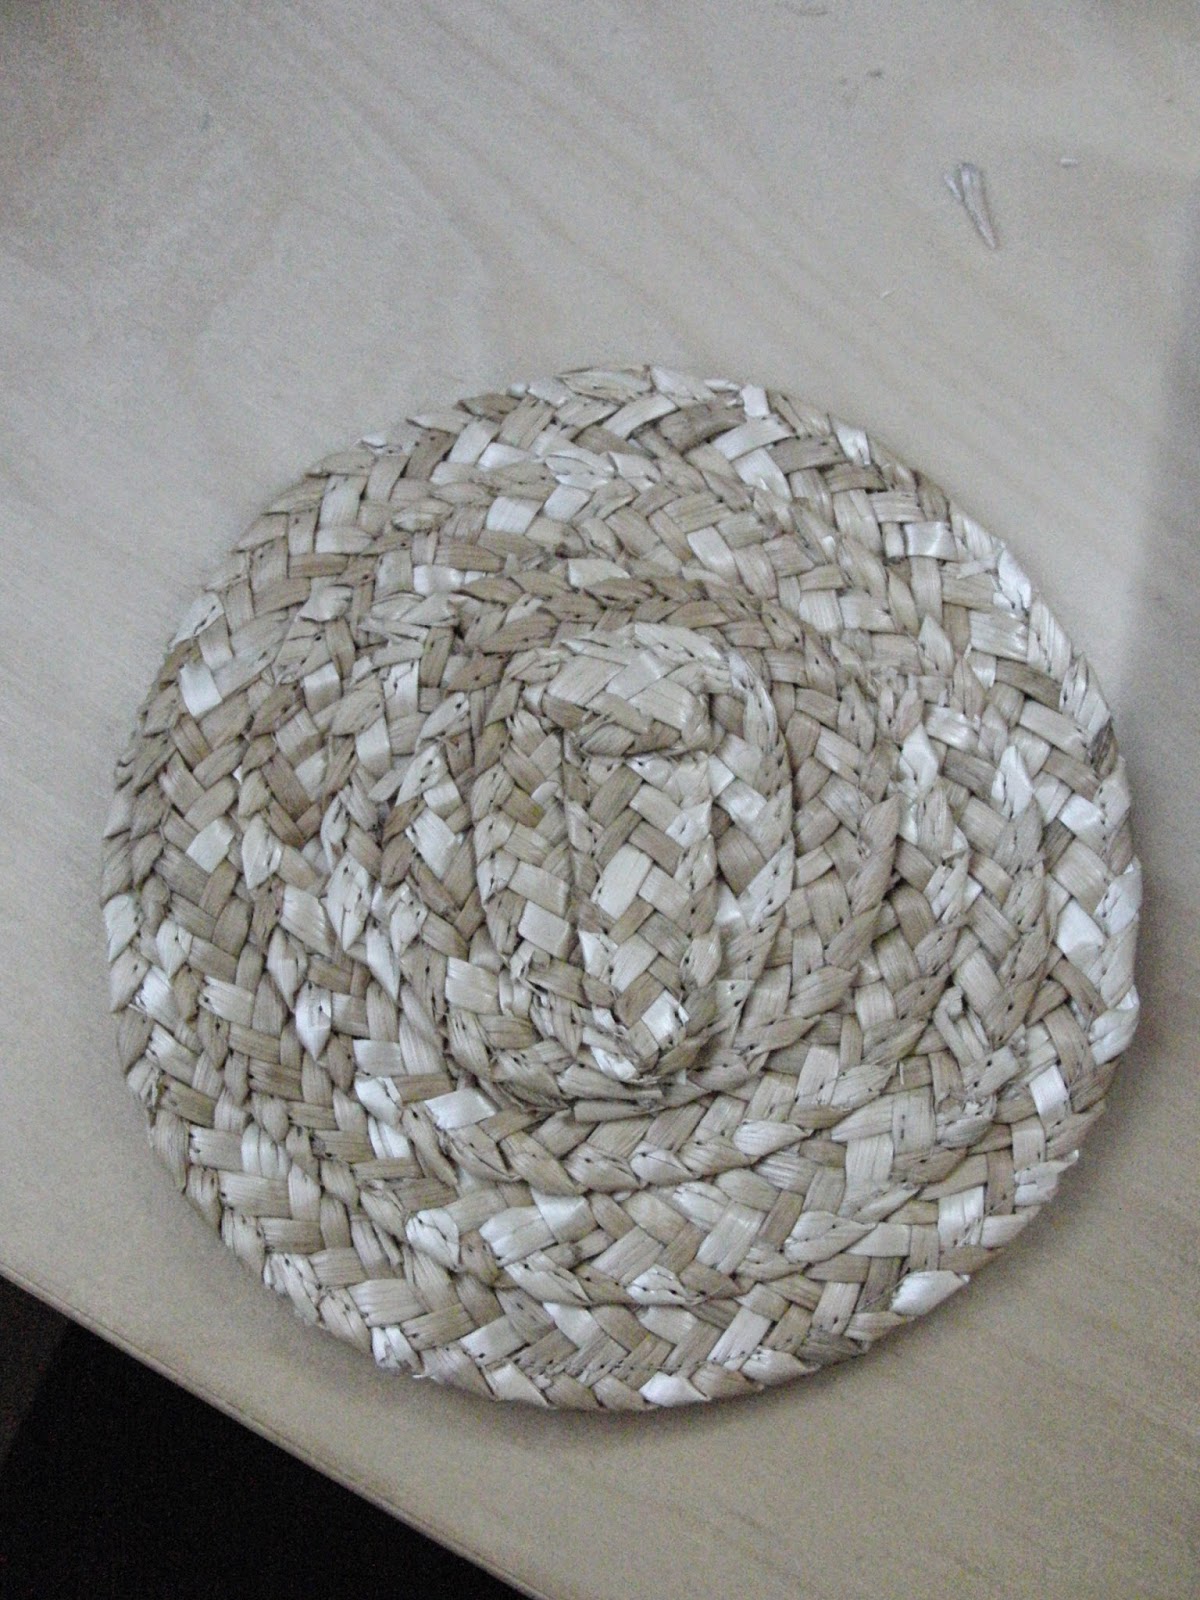
 The crown is made from the original crown, but re-formed. I arranged the circle, drained it in hot water and pressed it overnight between towels and under a heavy tower of books.
This is the crown still a little damp.

 After the straw dried, I stitched it to the crown tip from outside to inside.


And here are the finished all neatly trimmed pieces waiting to get assambled.


 For the lining I am using my white cotton batist from my stash. I want the lining to be neatly pleated and covered by the first braid of straw on the outer edge.


I pinned the pleats and then turned the seam allowance up and under the straw. Then I glued the fabric to the straw.

Every pleat is fixed with thread in two places and glued again on the inside edge.


 Then the crown is attached to the brim. I wanted the stitching to be invisible, so I used a brownish thread to match the colour of the straw. If one takes a very close look, one would see the stitches though.
 
 Since I lined the brim before I attached the crown tip I had to be creatice with the lining. I covered a round piece of buckram and edged it with a self fabric ruche as my lining piece..


This is how far I got. Now I have to attach the bavolet and do some trimmings.
I really love the way it frames my face...

Donnerstag, 1. Mai 2014

Another Belle Epoque Hat

When I started my first Belle Epoque Hat I also started this one, which was included in the Lynn McMasters Pattern Package. It has a very beatifully curved brim I am very excited about.

This is how far I got:

 These are the pattern pieces. This time the brim contains two pieces. The small one will be the curvy piece of the brim.

I cut a fairly high crown side piece so I can chose the hight of the crown later.
 The lines on the brim piece indicate where the waves will be.


Millinery wire is sewn to the outer and inner edge of the brim. I think the wire on the inner edge is supposed to support the curvy part, which was actually very difficult to form.
But in the end it turned out very nice.


This is where I ran out of wire and the brim has been stored in a box waiting to get a crown ever since...

My first Bonnet!

For my first bonnet I chose the Lynn McMasters Pattern for Early Victorian Bonnets. My plan is to make it fabric covered, but I am not sure about the colour and fabric yet.

The Buckram used is a soft white one. It is easier to work with since it isn't as stiff as the brown buckram, but it wont give much support for big hats. I thing it will work fine for my bonnet.
After I cut out the pattern pieces, I joined the centre back seam by hand.


 Then the crown is attached to the bonnet side by hand. The crown is edged with millinery wire.


 The brim edge (is it called brim on a bonnet??) was too sharp for me so I used the bonnet back pattern piece to make it a bit more curvy.


 Then the brim is edged with millinery wire, too. The bonnet brim is attached by sewing a cross on every tab of the bonnet side piece. The extra length of the wire is then sewn around the centre back. Since I am lazy on hand sewing I am using my sewing machine.
Good thing that the buckram is see-through..


To cover the brim with the mulling I glued some unbleached muslin to the buckram.
This is where I stopped, because I am not sure about the colour and fabric.


To be finished soon!

Hats and Bonnets

I have been very busy making headdresses lately!

Along with my Belle Epoque Hat I started another hat from the same Era, which has a lovely shaped brim. It is still unfinished, because I ran out of milliney wire halfway through. The wire arrived a couple of days later, but then I focused on the black Belle Epoque Hat with the black bows...

I also started an Early Victorian Bonnet from a Lynn McMasters Pattern, which is still uncovered and a 1840s straw Bonnet which is nearly finished.
The straw bonnet is made from a cowboy hat I bought on ebay. In fact I bought four hats in a set  so I made another hat from it:
A 18th century Begére.

Visual proof!!


An Early Victorian Bonnet after assembling the pieces, but before covering with fabric.


The Belle Epoque Hat after I ran out of wire


The 18th Century Begere. This was actually the easiest hat ever! I removed four rows of straw from the crown sides and then pressed the old hat over night. Then I attached the crown to the brim and added a satin ribbon underneath the brim.
Tadaa!


The 1840s Straw Bonnet. What do you think of the silk ribbon? My sister brought it from NY last week.


Detailed posts will follow straight away:-)
fashion plate