Pages

Posts mit dem Label Hats and Bonnets werden angezeigt. Alle Posts anzeigen

Sonntag, 9. August 2015

Headweeks - Part 6 (HSF Heirloom & Heritage)

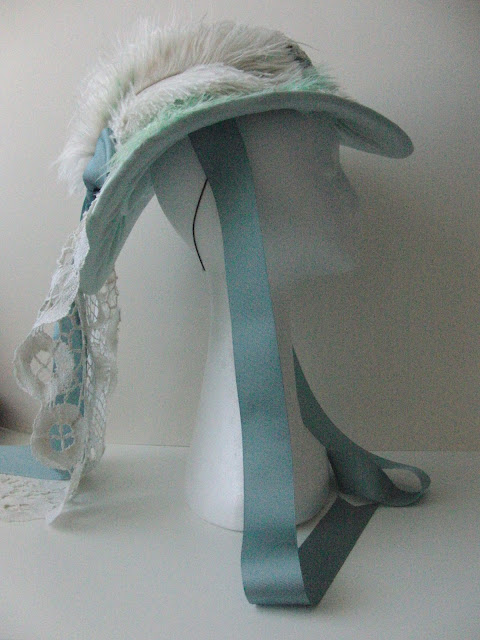
Guess what: I made a new hat!


The Historical Sew Monthly's August Challenge is "Heirlooms & Heritage" and asked to "re-create a garment one of your ancestors wore or would have worn, or use an heirloom sewing supply to create a new heirloom to pass down to the next generations."

There are not many historical pictures in my family to look at my ancestors clothes, nor did any historical garments survive... The photos we have show mostly male family members in uniforms and lilltle children. Since I am not keen on making an uniform or childrens clothes I had to find something else.
I originally planned on finishing this hat for the July challenge and intended to skip this one, but then it touched my mind, that the bobbin lace veil is actually a heirloom itself and therefore would be perfect for this challenge!
I got it from grandma last year, when we emptied her apartment for her move. Along with fabrics, old bedlinen, tablecloth's and her bobbin lace equipment I got some small and medium sized lace doily's.

Although it was tempting, I didn't dare to use the bobbins to make lace for a historical garment ("use an heirloom sewing supply"), but I decided to integrate one of these heirloom doily's into a historical item to pass on myself.
This way I can actually wear something my great-grandmother made herself and also integrate a heirloom into my historical sewing.


This is the doily before pressing. It is large enough to cover the entire crown and prolong into a veil down the back of the brim.

The pattern used is Lynn McMasters Civil War Period Hat...


http://lynnmcmasters.com/CivilWarHat.html


 ... which was obviously inspired by this one:
Snowshill Manor © National Trust / Richard Blakey
Hat 1349782 National Trust Collections

My version is a mixture of both. I used straw on buckram as base and lined it in a mint-green-light-blue-ish silk- cotton blend, covered the crown with lace and feathers and added ties on both sides.

So before I start to shower you with all the pictures:

The Challenge Details

 A 1860s Summer Hat
Fabric: Silk-cotton blend, cotton batist, my heirloom lace doily
Pattern: Lynn McMasters "Civil War Period Summer Hat"
Year: 1865-1870
Notions: Straw braid, buckram, millinery wire, grosgrain ribbon, ostrich feathers, elastic tie
How historically accurate is it? The pattern and materials used are ok, although the doily is not 1860s, but 1920s. I also used glue in some spaces. Let's say 50%
Hours to complete: around 15 (some just staring at it)
First worn: not yet
Total cost: about 30€

Photos!!!
Be warned! A lot of photos!

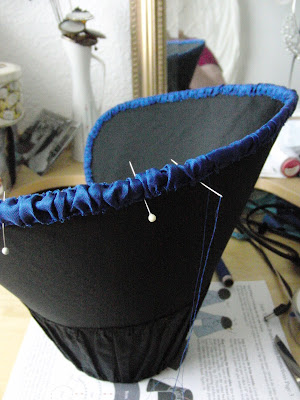
The only construction part a little different than usual was sewing on the lining on the upper side of the brim and then folding it to the underside. Since the couloured fabric is very thin I flatlined it to one layer of cotton batist.


My first attempts to trim the hat.


I edged the grosgrain with narrow lace at first, but after adding the bobbin lace the colours didn't match. So I unpicked the lace and left the hatband plain.


More experimenting...
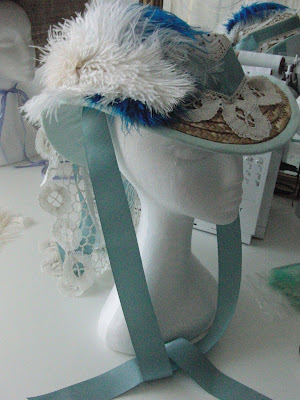


It is actually characteristic for me to linger about hat trimmings. I always want to be able to make changes to my item. That makes it really difficult for me to decide and sew on some trimmings.
After literally staring at my hat for hours (no kidding!) I finally decided on the following version and I couldn't be happier!


I wanted to use this mother-of-pearl hat pin, but I just cannot bring myself to actually punch it into the hat...


So, what do you think of this hat? Let me know!


Samstag, 1. August 2015

Head Weeks - Part 5 (HSF Accessorize)

Continuing my head weeks and contributing to July's HSF challenge #7 Accessorize I finished a cap I started ages ago.
The readily cut pieces have been in my stash for over 6 month, before I finally started to sew them together.
 The cap is super plain and I mainly made it to improve my handsewing skills, which also is the reason, why it took me so long to actually sew it together after cutting...

The Challenge: #7 Accessorize
Fabric: A very old linen Pillowcase
Pattern: MF-3 Woman's Caps
Year: 1770- 1790
Notions: linen thread
How historically accurate is it? Pattern and materials are, as well as the sewing technique.
Hours to complete: about 6
Total cost: 15€ for the pattern


Now that this cap is done I must admit, that I quite like to wear it at home:-)

Montag, 29. Juni 2015

Head Weeks - Part 4

The more Hats and Bonnets I make, the more difficult it gets to store them away...
Not every Item is fitting into a round Hatbox, or it is impossible to find a suitable size, or the asked price is too high - you name it...

So what to do to prevent my treasures from dusting away?

A few weeks ago, when I searched the internet for Bonnet inspiration I came across a most peculiar item:
A Bonnet Bag
I have never seen such a thing before, but I wanted to have one that very minute!

This one:
 An original Bonnet Bag from the mid 19th century.
Bonnet bag  French, used in America, mid-19th century  PLACE OF USE  Boston, Massachusetts, United States  PLACE OF MANUFACTURE  France  DIMENSIONS  Overall: 38.7 x 33 cm (15 1/4 x 13 in.)  MEDIUM OR TECHNIQUE  Cotton twill, wool twill, wood  CLASSIFICATION
Museum of fine Arts Boston - Bonnet Bag


I just had to make my own!

Before I get to my Bonnet bag I have to confess, that I have absolutely no talent to indicate fabric contents...

So it happend after the first cut into my chosen fabric (an old tablecloth from grandma) that I realised (a little too late) I just had cut into a vintage SILK tablecloth... Sorry family...
In my defense I have to add that I pulled the fabric from my stash and when we collected all the stuff from grandma's apartment my mother knew that I would use it for sewing.

The damage was done, so I made the best of it:


The bottom was formed by sewing reed to a linen base. I originally planned on adding two lines, but it was so fascinating to watch my sewing machine do all the work without me touching it, I ended up with eight rows.
The bag itself is a rectangle piece of fabric sewn shut on the short edges. The boning channels are constructed in a similar way like a corded petticoat, not filled with cord but reed. The drawstrings are cotton twill-tape.

When not in use the bag can be stored flat

Hmm. Maybe a bit too large for my mid victorian bonnet...
The solution: Two bonnets in one bag!
To protect the silk-lining of my newest bonnet from the raw straw of my oldest one (sill untrimmed...), I put a scrap piece of the same tablecloth between the two bonnets.


Hurrah! Two bonnets safely stored instaed of just one!


Watch out - there is more head stuff to come soon!

Sonntag, 28. Juni 2015

Head Weeks - Part 3

I finished an UFO!
And a really old one, too! The early victorian bonnet I started in february last year is finally done!


At that time I made the buckram frame and the mulling. I stopped there, because I wasn't satisfied with it. So last month I removed the old mulling and did a new one. When I went fabric shopping for my Regency Bonnet I bought enough silk taffeta to cover the victorian bonnet as well.
The edges are trimmed with gathered taffeta ribbon.
I used the same ribbon to trim the bonnet both inside and outside.
The pattern is Lynn McMasters L32 "Early victorian Bonnet"

Without further ado:


preparing the ribbonwork trimming


The ribbon roses cover the stitching fom sewing on the outside trimmings


Be warned: this was not the last post on headwear...
fashion plate