Pages

Posts mit dem Label 1740- 1760 Stays werden angezeigt. Alle Posts anzeigen

Mittwoch, 23. Juli 2014

OMG! The stays are done!!!!!!

Congratulations! It's a pair of stays!!!!
1740- 1760 Stays

I can't believe it!!! I am so happy right now, that I'll possibly write some nonsense...

Hurraaaaah!!!!

Miles and miles of handsewing paid off and now I am the proud owner of 18th century reproduction stays!!! Waaah!!!
In the end it took 5,5 days to sew my pair of stays. Today I finished the tab binding, so before I continue to cheer I am giving you some more construction details:


The leather binding is attached with backstitch and then folded to the underside. The backstitching actually took longer than fixing the binding to the interlining. My guessing was exactly opposite...

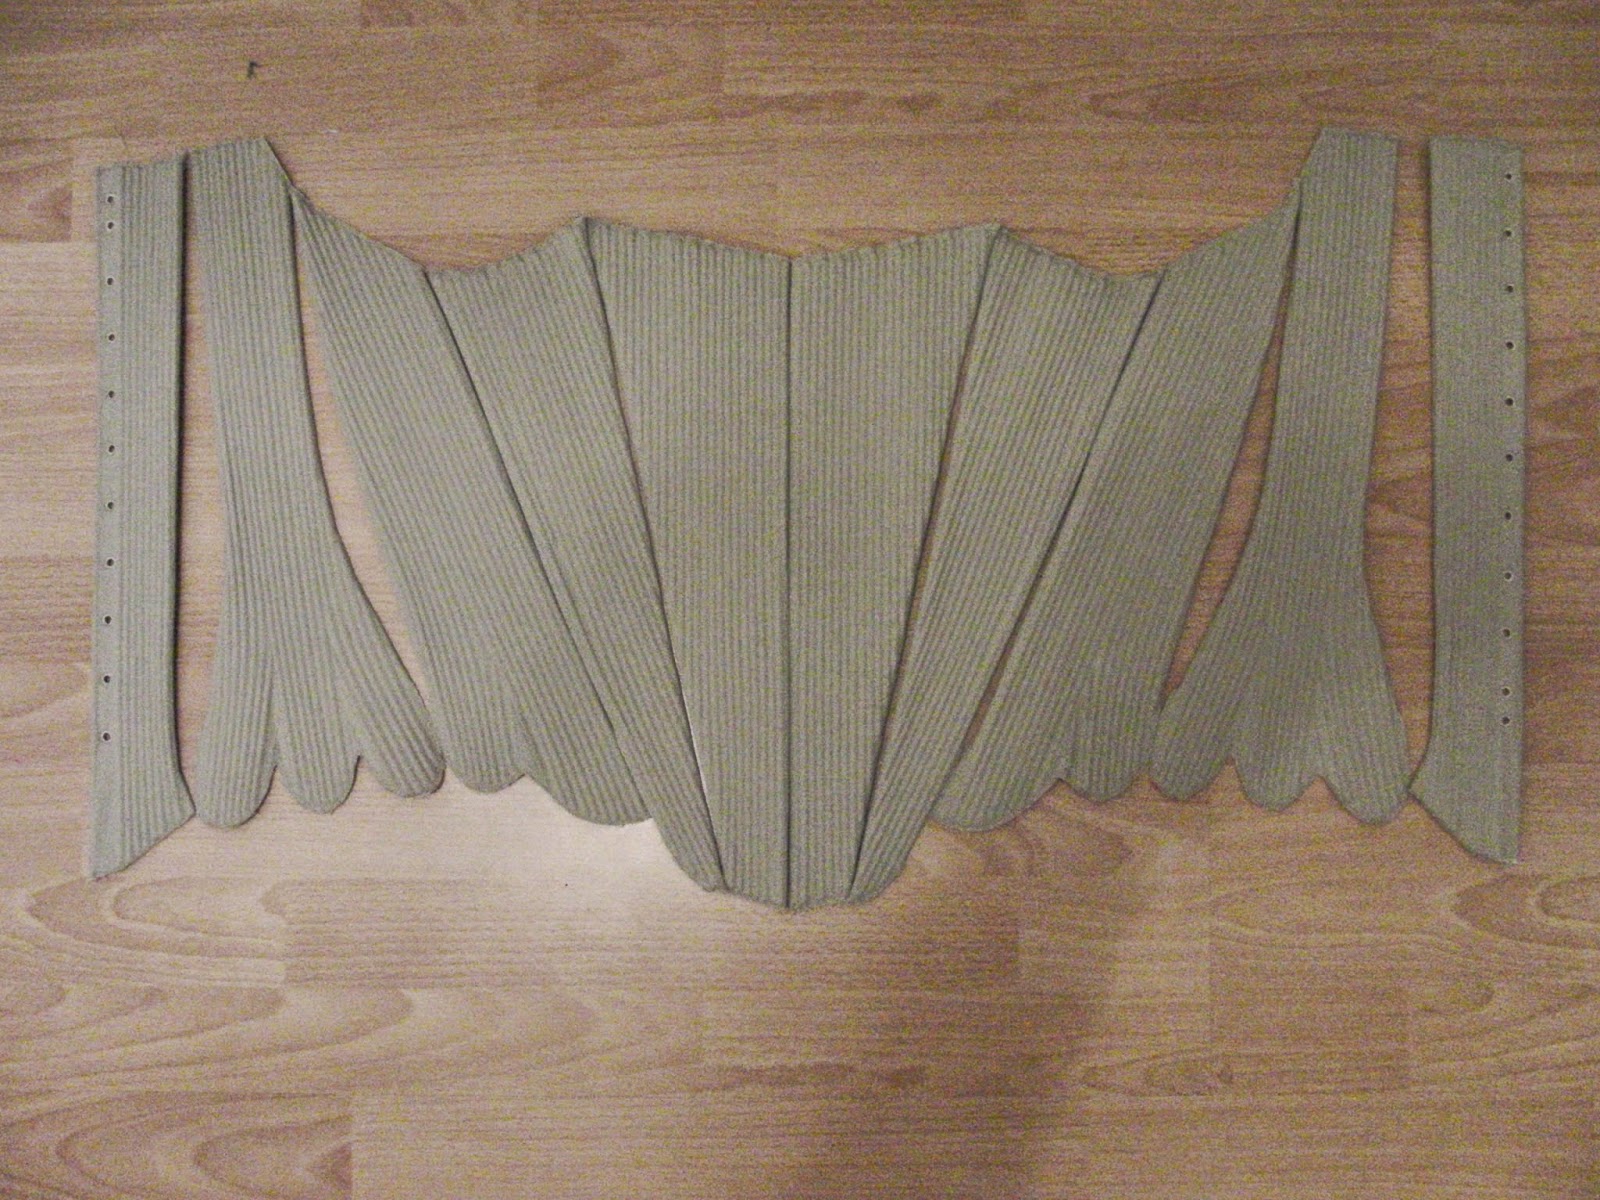
So, after doing this I started to sew the strip to the tabs and soon realised, that it would have been a good thing to use boning in my testpiece. Those curves were not so easy, as I had hoped... My result on the first two tabs was quite bulky and so I changed my strategie to cutting a scallop here and there instead of the cuts. 


To prevent the fabric from fraying I cut the needlepoint "curves" at the very last moment before attaching the binding.


The inside look of the finished tab binding. Here you can see the rounded edges I have cut.


After so many days of handsewing my poor fingers sure deserve a holiday!!!


HSF Challenge details:
The Challenge: #12 Shape & Support - 1740- 1760 Stays

Fabric:  0,5m Cotton twill as fashion fabric, 1m cotton as interlining, 0,5m cotton batist as lining

Pattern:"Costume Close-Up" by Linda Baumgarten

Year: 1740- 1760

Notions: kid skin, reed, polyester and cotton thread

How historically accurate is it? I am giving myself very generous 95%. Cotton would't have been used in that period and we don't have to talk about the thread. 

Hours to complete: ca. 60

First worn: Not made for me, so I will never wear them:-(
Total cost: ca. 55€

Here we go!!!!
OMG, I still can't belive that I have finished these stays!!!!!!


To form the hip section I steamed and formed the tabs.

Comparison with the detail picture in Linda Baumgarten's "Costume Close-Up" - 1740- 1760 Stays

187 boning channels in perfection!!!!


What do you think about these????

Dienstag, 22. Juli 2014

Concerning Leather Binding

CAUTION!
What fallows is a very long post again!

Ok, now I know for sure, that stays like mine are not done in two to three days. And not in four. At least not by me.
Maybe 6???

As you can imagine I've been working hard on the binding of my stays from Linda Baumgarten's "Costume Close-Up"...
My first step of the binding preparation was remembering an article (on foundationsrevealed.com) I once read about stay and corset binding, so I searched for it to refresh my memory.
The tutorial is very good, but unfortunately not applicable on leather for all steps...

Since I didn't want to ruin my newborn stays I made a testpiece first. (I am getting used to test pieces...)

Have a look:


 My testpiece has been a testpiece before... I used my pattern to cut two tabs exactly the size on my stays.
My testpiece
 Then I started sewing on a 2,5cm wide leather strip around the edge like described in the tutorial I mentioned above.


 To test the look I used two different stitches for the test tabs: backstitch and running stitch


Then I folded the leather to the under-side and attached it to the lining, again using two different methods to compare.

On the left side I made small cuts and stretched the leather a lot to go smoothly around the tab.
On the right side I used bigger cuts, which made it easier to achieve the curvy shape.

Which one to choose?

 I am going for the small cuts.
Easier is not always better... Sure the right side was easier, but I am a really careful person when it comes to things I have never done before. I am just too scared that the big cuts would make an ugly sight and also that the leather would snap.

So much for the outside curves.

Now the inside curves (again two methods):

To make an easy way around this needlepoint corner I made a cut at the centre of the curve. This was quite easy and neat, both inside and outside.
BUT, when I stretched the leather to lie flat on the backside the cut teared open even further... Not good.


For the second option I decided not to make any sharp cuts or anything that would invite the leather to make exactly the same as above. So I cut out the piece as shown in the picture below. The now narrower strip can be folded around the inner edge much easier (but not as easy as the big cut, sigh..) and minimizes the risk of damage to the leather.


Now the right-side picture you have been waiting for:

Left:                                                                   Right:
Running stitch, big cuts, cut on the inner edge        Backstitch, small cuts, section cut out on the inner edge

Right it is!!!

Since I am not tatally crazy I will start the comfortable (well, as comfartable as it can be) top-edge of my stays...

Tools to use:
big scissors (for the leather), small scissors (for the thread), pincer (is that the right word? - to pull the needle out of the mass of fabrics, tweezers (to pull my thread in delicate situations) and an ordinary handsewing needle. And thread.
NO LEATHER NEEDLE!!!
I made the experience, that a leather needle would indeed cut easily through leather of any kind, but due to its sharp triangle point it also gives the perfect start-up for a (very much feared) fissure.  
So an ordinary needle it is:-)
My binding tools

Let's do it!!!

My, er, binding to be


My leather strips are 2,5cm wide as tested on my testpiece.
I used a rather small backstitch to sew the leather to the stays, making sure to have a relativly small seam allowance like the original stays.

Leather strip sewn to the stays, right sides together

Phew, halway there...
 Silly me said: "The worst part is done! One only has to pull the leather back and attach it, right?"
WRONG!
The first small binding challenge arrived not even 10cm later, when I was faced with an edge. Folding the leather over the edge woul produce a bulk I wanted to avoid. Therefore I made a cut where the tutorial told me to fold.


Ah, le voilà!! Good edge!


Now it appeared that my former goat wasn't a big one, so my strip was not long enough to cover the entire top. I used a very narrow overcast stitch to sew two strips together and than continue the binding as if nothing happened...


Hurrah!!!! One edge down, one to go...


Leather binding inside and outside.

Sonntag, 20. Juli 2014

More hand-sewing!

It is one piece!
Another day of handsewing is over and my stays are nearly done!!!!

See for yourself:

Outside
Inside
It took about 30 minutes per seam to sew all the pieces together, so another 4,5 hours in total.

Boning channels, anyone?
Phew, honestly I can't wait to go back to a machine-sewing project. Today it was especially hard to sew through all those layers by hand. After one seam I decided to wear a leather glove to have a better grip to the needle. It worked much better then and the thimble finally fits, but with 28 degrees outside it wasn't exactly comfortable...

So, now that I have stays, the finishing touches are waiting to get done. The seams of the original stays are covered with leather and the binding is in leather as well.
Since I made a leather bargain for my gloves I had lots of skins to choose from...

First I cut narrow strips for the seam-covering. They are about 6mm wide.


All the strips waiting to get sewn to the stays by, wait for it... HAND.

Oh my, more handsewing then.
Seamcovering with kid skin, outside

Seamcovering inside


OK, stays are not done in two to three days.
But maybe four???

Samstag, 19. Juli 2014

Eyelets are evil!


Stays are not done in a matter of just 2 or 3 days (of course I will try). I have been working on them all day again and the only progress I made in about 13 hours of work were:

The eyelets...


And turning under the seam allowances, which then were attached to the interlining:

Inside view of the side panel waiting to get assembled...

At least they are starting to look like stays... I feel a bit frustrated that although I have been sewing all day I am only two steps further than yesterday. Again, these are my first stays. Next time I shall know exactly what I am doing and how much time one should resereve for something alike this project.

With the last strength my abused fingers could manage I started to sew two pieces together, but that is it for today!


We'll see how far I can get tomorrow. The weekend still has one day left, right?


Freitag, 18. Juli 2014

Stays

Oh, well. I've been waiting long enough to finally make some stays. Now it is time to do do something about it. Because I am a stays newbie I have choosen a pattern which looked not too complicated in my innocent beginners eyes...
My choice: the stays from Linda Baumgarten's "Costume Close-Up".
They are dated 1740 - 1760, are strapless, leatherbound and without busk. So when I went fabric shopping last week I bought a light brown cotton twill I am going to use instead of the original wool satin. My boning will be made from reed with a 2,5mm diameter.
I started yesterday afternoon and spend every awake moment ever since to work on my new project. It will be my very late entry for the HSF challenge #12 Shape & Support, which was due two weeks ago.
Better late than never, right?


 First I scaled up the pattern


Then I cut my fabric and two layers of cotton interlining. The original stays contained a linen interlining.


To test the width of the eyelets I made one test eyelet on my test piece. The eyelets are worked, but not using buttonhole stitching like it was done on the original stays. I am using the same strong polyester thread as I have used for my gloves.

 You know I am a lazy seamstress...
That is why I made all boning channels with my beloved sewing machine. I wouldn't dare to have her unused all day anyway!
Stitching the boning channels on the side back piece


To smooth the sharp edge of the reed I used some sand paper I had left from building my bunnys tower...


After pressing and steaming and smoothing 187 strips of reed I got this:
Right side

Left side

Then I started the eyelets. As you can easily see these eyelets are smaller than the one on my test piece. And why is that??? Because I made my test on 3 layers and not on the 6 I am having with the seam allowance turned under. I'm sure they will work nevertheless...

This is how far I got yesterday and today. Now I am tired and my fingers are hurting a lot... 
See you tomorrow!!!
fashion plate