Pages

Posts mit dem Label Bustle Era Hat werden angezeigt. Alle Posts anzeigen

Samstag, 7. Dezember 2013

My first hat!!!

It is finally done! I have finished my first hat ever!!!
And I really like the result.
I managed to stay within the one metre allowance as well. Here are my "hat calculation" and the challenge details:

The Challenge: # 25: One Metre

Fabric: Muslin for the mulling, cotton satin as fashion fabric, taffetta and chiffon for the trimming. Calculating with a fabric width of 1,5 metres (the cotton satin) I used exactly 0,96 metres of fabric. Phew...

In detail:
Hat
0,24m muslin for the mulling
0,3m cotton satin
0,05m taffetta for the lining

Trimming
0,1m cotton satin
0,15m taffetta
0,12m chiffon

Pattern: Lynn McMasters Bustle Era Gat Pattern, view B

Year: 1870 - 1880s

Notions: Buckram, Millinery wire,Gardening wire, Nylbond, Polyester thread, Glue.

How historically accurate is it?  The pattern is accurate and the trimmings are as well, but the taffetta and chiffon are polyester fabrics. For some parts I have used my sewing machine. I give myself generous 80%.

Hours to complete: about 20 hours.

First worn: I am so in love with this hat, I am wearing it as I write this. I simply cannot take it off...

Total cost: 15€ for buckram and millinery wire. Everything else is from the stash.

Pictures!!!!


For the bows on the back I used gardening wire to fix together three rectangle parts of both cotton satin and taffetta. I covered the joining part with fabric to conceal the wire before attaching the bow to the brim.
 Here we go...


front view

side view

back view. I could stare at this for hours!


 Inside view. Here you can see the stitches on the inside of the bandeau where I attached some of the trimmings.


 A detail of the backside trimming. I didn't cover the fuzzy part on the brim in the end. In fact, I am starting to like it :-)

From top to bottom:

bow of satin and taffetta
loops of chiffon
brim
loops of chiffon
bow of satin and taffetta
"something" from taffetta (not visible in this picture)
another satin monster bow.


I LOVE IT!


Freitag, 29. November 2013

Loops & Bows

Not long now and I will wear my very firs hat! I finally attached some trimmings to the brim. I'm having an enormous bow on my forehead and lots of loops on the sides, but I am not quite sure what to do with the back.
But before I started with the trimming I fixed the bandeau inside the hat. It is supposed to shape the hat and keep it in the right angle. The stitches run through the brim at four spots.


 To prepare the first bow I didn't pin, but used magnets to fix the fabric. This way I avoid those tiny marks on the fabric. It is the front decoration after all...
 ... and it looks ridiculous! I didn't keep in mind that the fabric would shape around the crown. The small part of the bow is way to long. But since the ends of the taffetta were already finished I decided I would have three bows instaed of two. The big one in the same fabric like the hat (cotton satin) and the small ones from a slightly darker taffetta.


Here is my finished monster bow!


 For the loops I used the same fabrics as for the bows. To prepare them I made some ribbons as seen on the right.
After pressing I turned the inside out and formed the loops using thin wire. Unfortunately this took more fabric than I thought. Now I have to be very canny with my fabric to stay inside the one metre allowance... To make some space in my calculation I decided to not include the buckram. It is no real fabric, is it?
 Before I actually started sewing on the loops I used my magnets again to run a test where to place them.

The beginning of my row of loops was rather messy so I covered it with fabric. It will be covered by the bow as well, but it should be neat anyway...

This is the front of the hat. The loops leaving a gap for the bow.

I am very pleased with the result and cannot wait until my hat is finished! The backside is still quite empty, but I will think of something nice within the limits for this challenge.

Here are some pictures:


 Side brim with loops...
 ... backside without trimming...


... and the front view. For these last pictures I used the flash light on my camera, so you can see the "real" colour of the fabrics.

Does anyone know how this is to be fixed to my head???


Montag, 25. November 2013

Crown and Brim

I have decided that the fashion fabric of my hat is going to be blue cotton satin from the stash. Actually it is an old IKEA curtain I bought ages ago and never used for my windows... Blue is my favorite colour and most of my selfmade dresses are either blue (all shades) or black, so I figured blue is a good idea.

Here are some process pictures from the last two days:


 To attach the fabric to the crown tip I glued it in place so it stays flat while sewing around.


 To keep the fabric flat at the sides I clipped the seam allowance a few times. My stitches run about 5mm underneath the edge so they won't show after attaching the fabric to the sides.

To do so I pinned the seam allowance of fabric on the sides with the right side in and stitched around the crown again. This time I did it as close to the tip as possible. Since the hat wire is attached to the tip at that place, it was not so easy to sew so close to the top...

 Here is the finished crown from the inside. Do you see the blue line above the wire? That was my first line of stitches. If you enlarge the picture you may be able to see the second line aswell. It is hidden behind the wire.


After finishing the crown I continued covering the brim. To do so, I stretched the fabric across the brim and piunned it in place before using my machine to sew it to the brim. The under side is glued in the same way like the muslin before.

This time I cut away the seam allowance very carefully to avoid another hole... After doing so I attached a self fabric bias tape to the edges. For this I used the machine after gluing the tape to the edge.


 The next step was attaching the crown to the brim. To do so I used a curved needle and double thread. I am afraid pinning wasn't possible at this stage, so I just kept sewing around...


 And it worked! The crown matches the brim exactly. I was worried before, but now it looks like a real hat. The last step before trimming was to sew in the lining. I used a leftover taffeta from a gown a made a couple of month ago, which matches the blue of the cotton satin just fine.


 Tadaa! It is a hat!
See the fuzzy part to the reight? That is where I joined the bias tape and I couldn't manage better. I will cover it with lots of loops and bows. Maybe I will start with the trimming after work taday.


Donnerstag, 21. November 2013

One metre???

Since challenge #24 has been finished some time ago I am now wondering what to do for the "one metre" challenge which is due on december 16th.
It is obvious that it has to be something small and I wanted to make an underbust corset (a "real one" - not a corset girdle) for quite some time. But then I have just finished the half-stays and maybe should not participate with a corset again so soon?

The HSF is a challenge after all, so maybe I should do something that I have never done before.

And here we go: after pattern browsing I decided to try a Bustle Era hat.
I've had the pattern flying around for ages and never made anything from it. It is a Lynn McMasters pattern for four different Bustle Era hats.

Since I have never made a hat, I didn't have any supplies at all. Therefore I went on the Internet and ordered some buckram and millinery wire as indicated on the pattern. When it arrived I figured that (maybe) I have misread something...
That buckram is enough for TEN hats. I am certain there will be more hats in the future...

Now, enough talking! Here are some process pictures!!!


1. Cutting out the buckram. Gosh, that stuff is hard! I'm really curious how it will work.

 2. Adding millinery wire to the edges.
I am quite lazy so I planned to use my beloved sewing machine as much as possible. I took my strongest needle (100) and a special Pintucking Foot to sew on the wire. The thread is a heavy nylbond I thought I would never use. It has been much longer in my stash than the pattern... The opening in the foot appeared to be just the right size. Even the joining part of the wire wasn't a problem at all.

3. Sewing the center back seam close by hand.
I have been a bit concerned about sewing through the buckram by hand, but after trying I was surprised how well it worked. And it looks ok, too.

The same had to be done on the crown side.


 4. Joining the crown tip to the crown sides.
Hahaaa! It starts to look a teeny tiny bit like a hat! This had to be done by hand, too. For the handsewing I used a normal needle. That particular needle had been used a lot of times and on very heavy fabric as well, so it had a small curve from stitching through it. A fact that came in quite handy swing the sides to the tip of the crown...

5. Covering the wired edges with bias tape.
For this I used the leftover bias from my half-stays.
The bias is not sewn, but glued to the edges.
Hmm. some wrinkles... Not very pretty.


 6. Padding crown and brim.
I used muslin instead of the recommended flannel, since I didn't want to buy new fabric.
It is sewn to the brim and glued to the crown tip.


Fortunately I managed it without any wrinkles this time. And the ones I made before are all covered up:-)

No wrinkles on the top brim
 While the glue on the crown tip was drying I continued with the under brim.
The first step here was to sew the fabric to the buckram, than fold it to the middle and spray glue the rest of the fabric to the under brim.

Nearly no wrinkles this time...
Nearly no wrinkles on the under brim


 After the glue had dried I cut back the seam allowance and glued the mulling to the side crown.


Waaaaaaah!!!! I guess this is a beginners mistake:-( While trimming the seam allowance on the brim I accidentally cut away a piece of the bias tape, too. Noooooo! I hope it won't show later.

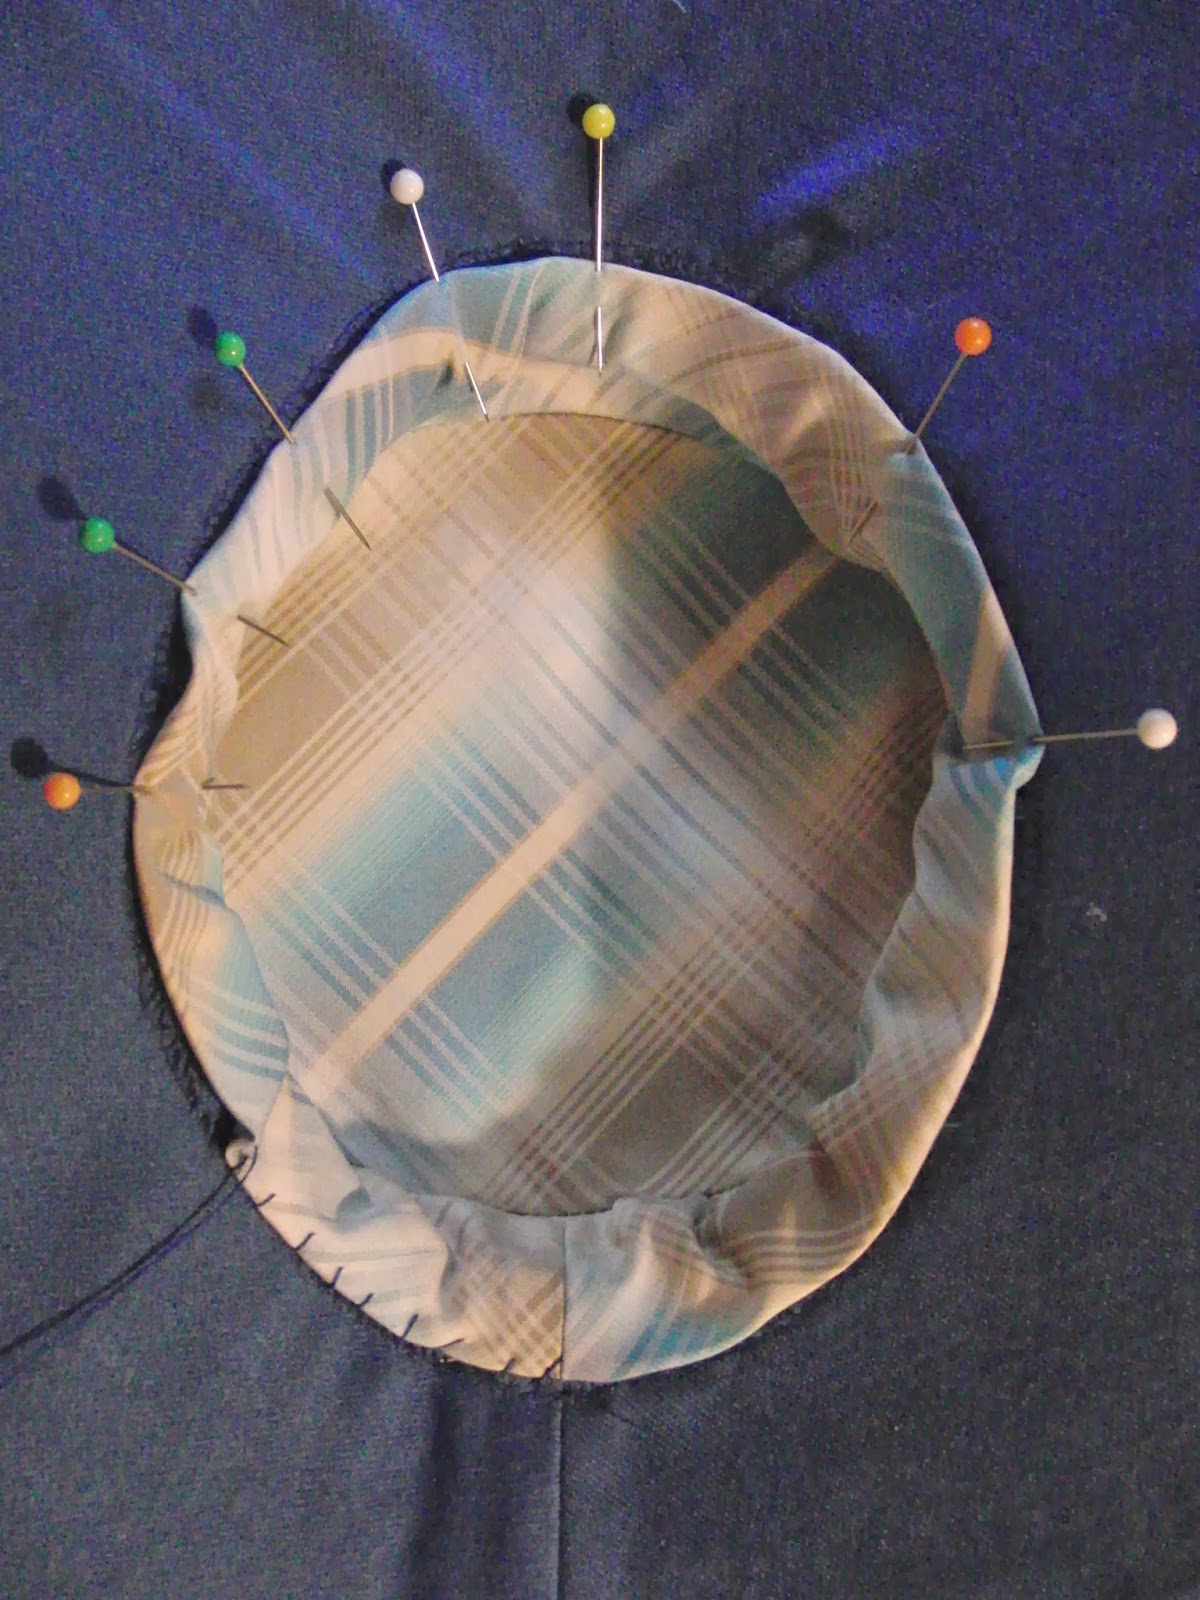
 7. Cutting away the center oval of the fabric and clipping the seam allowance.
Since I clipped the buckram between step 5 and 6 already, it was easier this time.
Enough for today...

Hhhmmm. Maybe I'm doing the corset anyway...


fashion plate