Pages

Sonntag, 21. September 2014

Edwardian Underwear

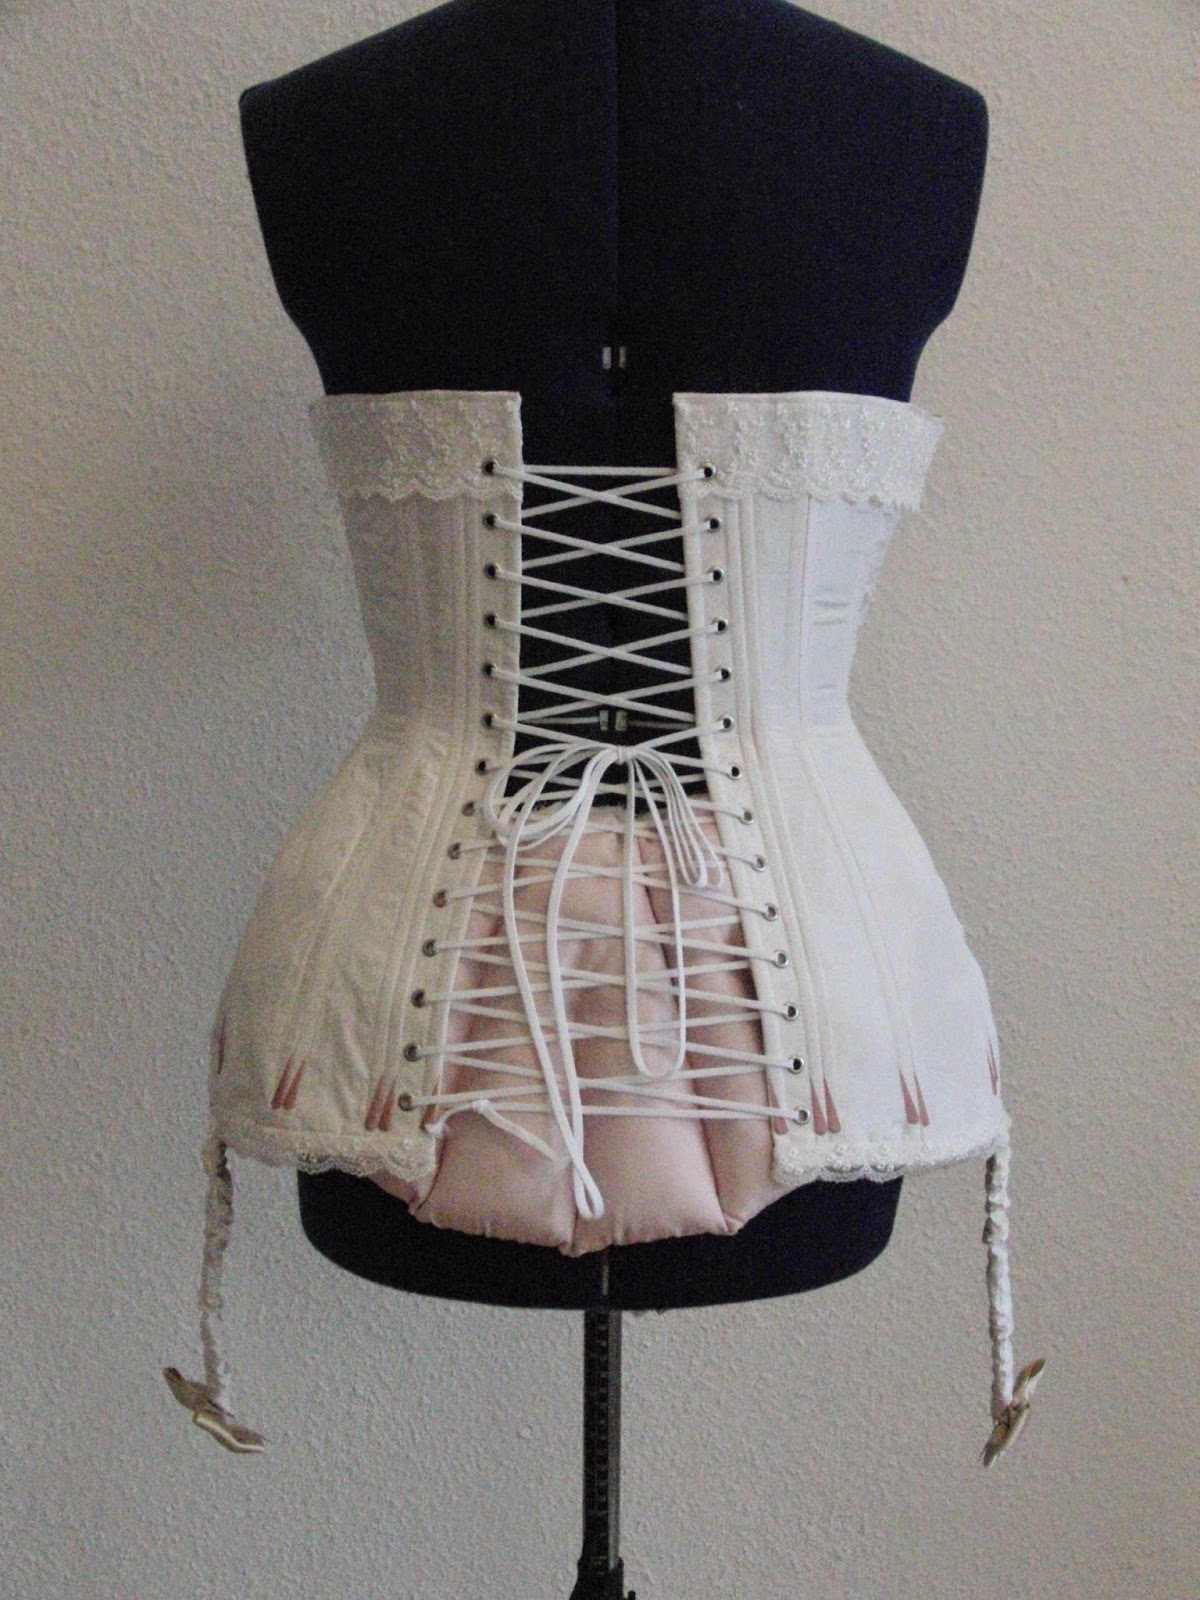
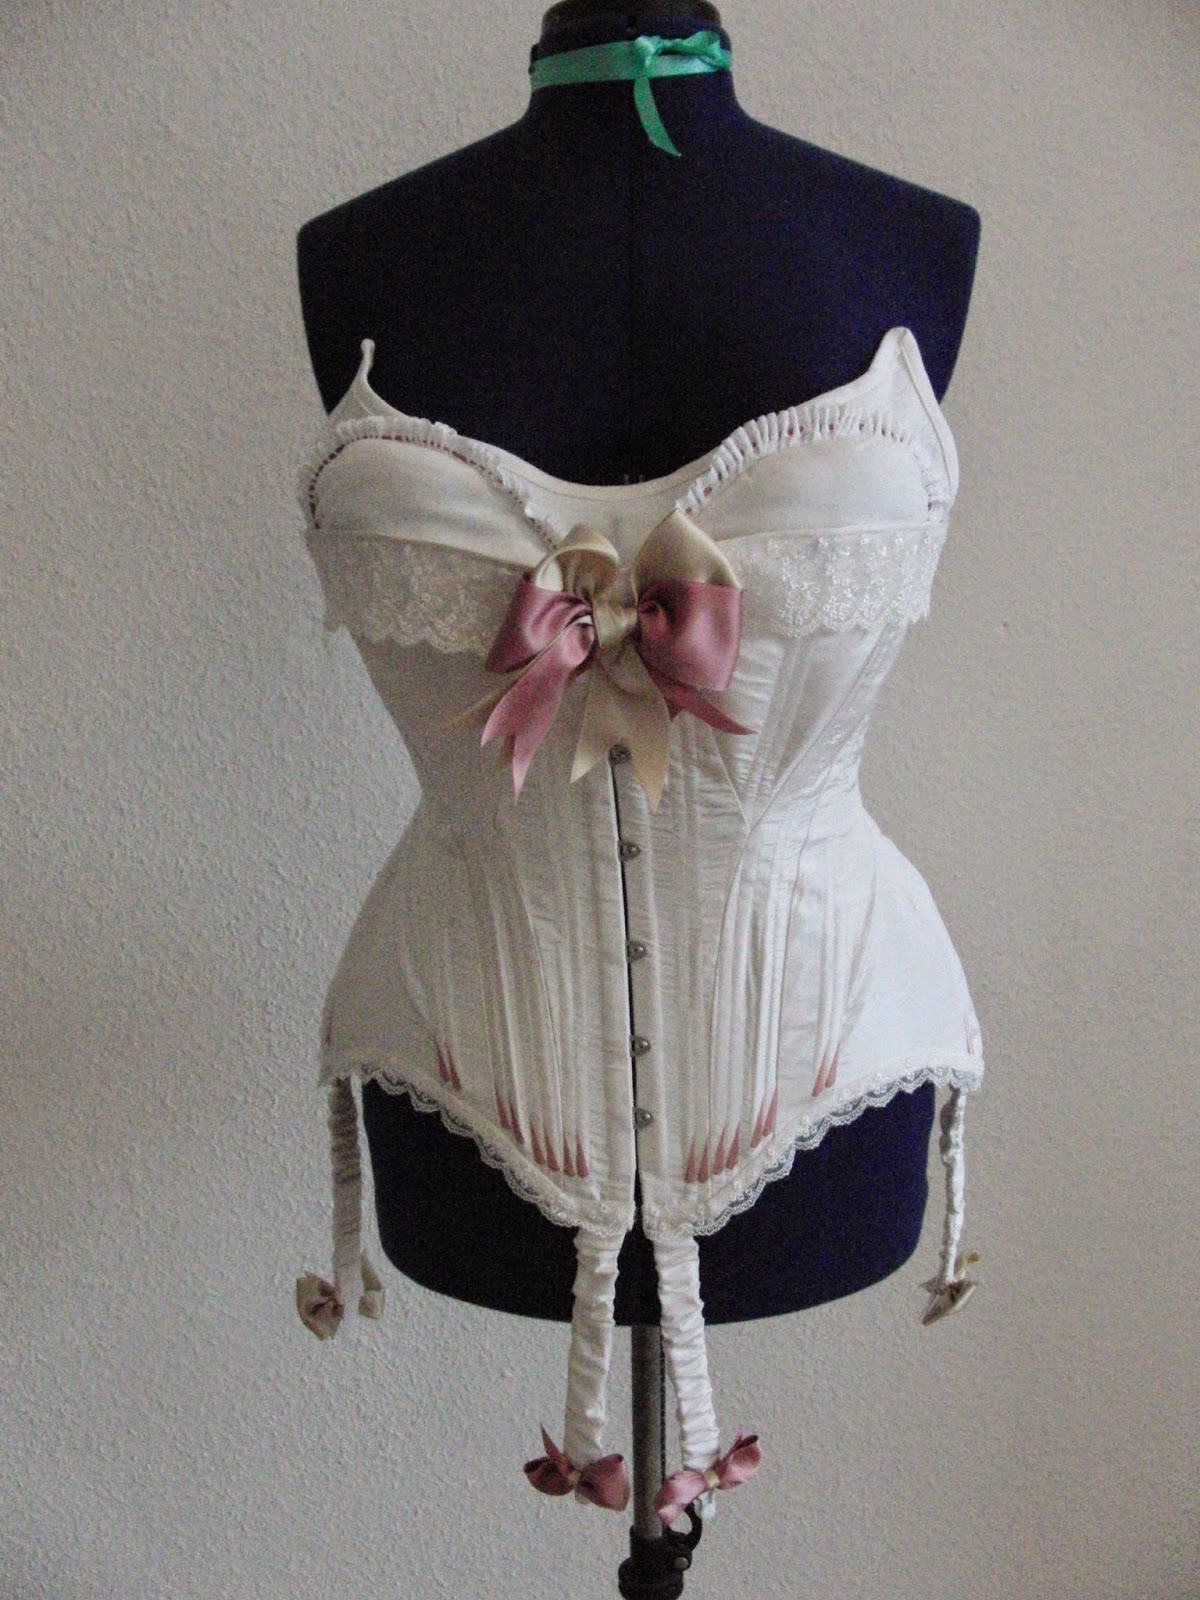
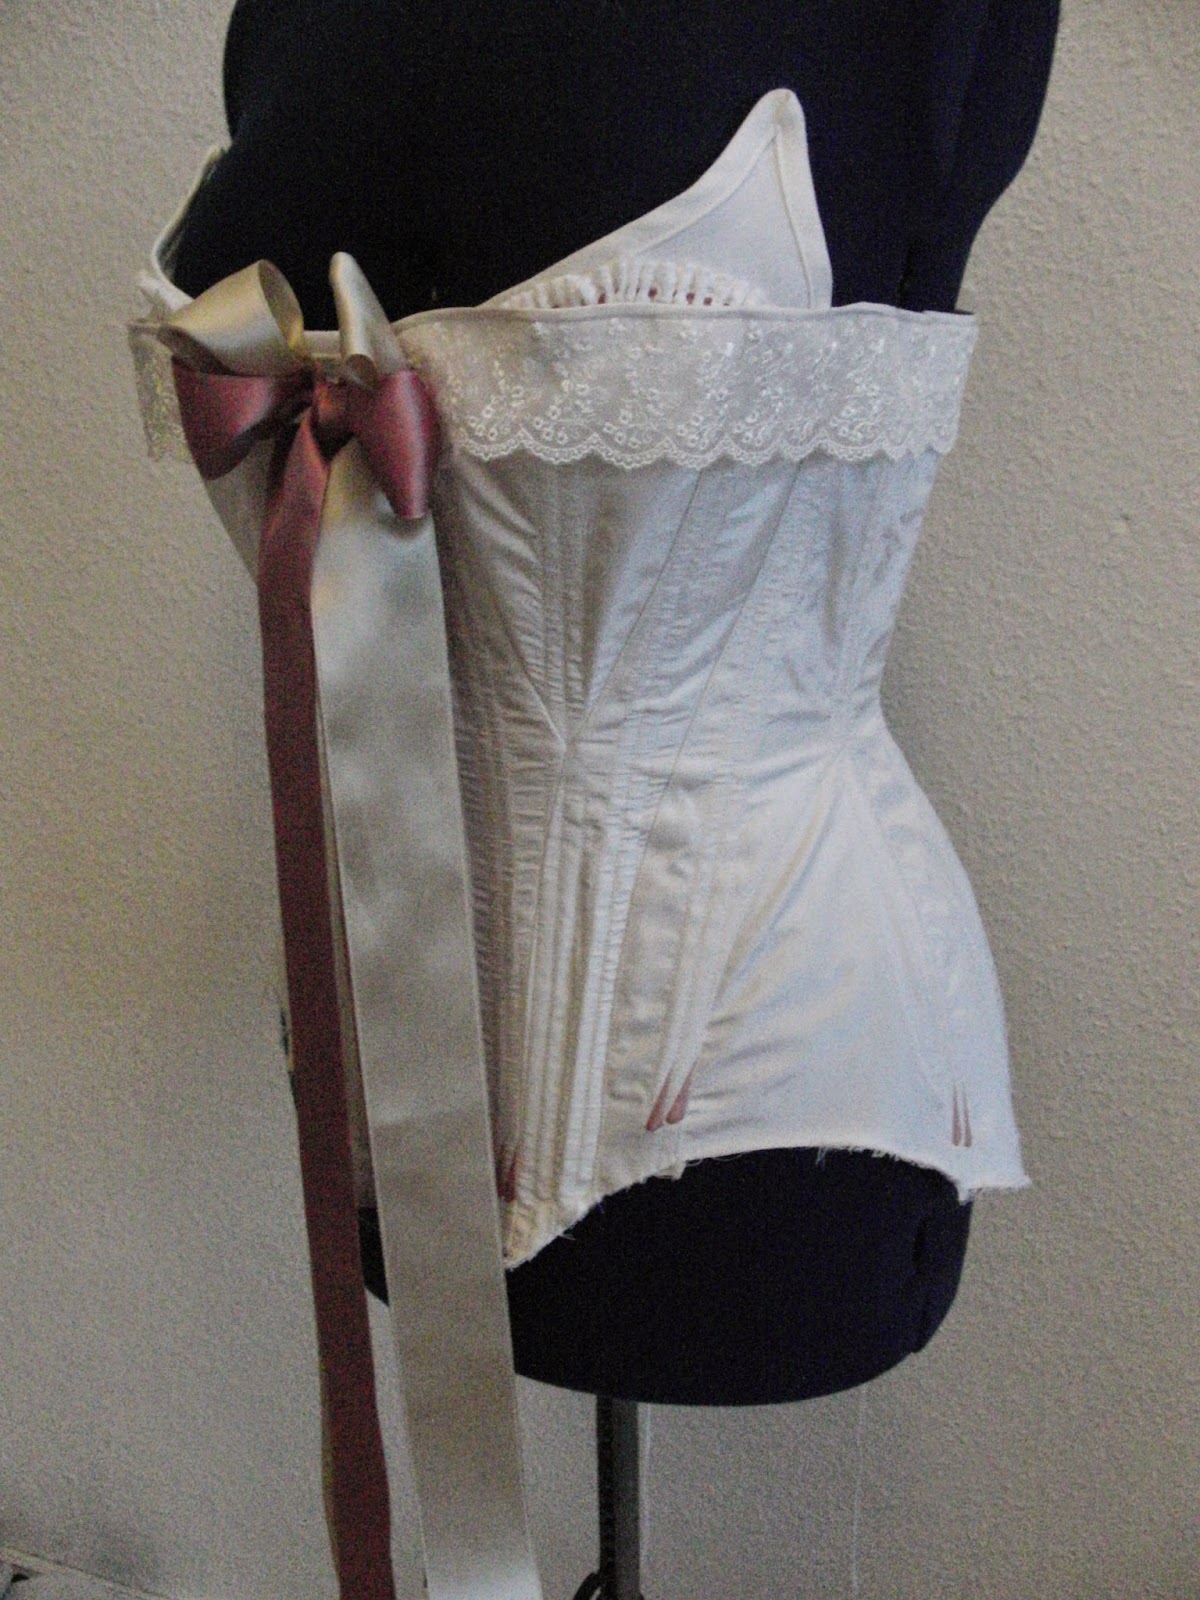
My edwardian corset and some more undies are finished!
After two more weeks (with not too much sewing) I finally have everything to go underneath the future yellow gown:

Edit:
The challenge details:
The Challenge: #19 HSF Inspiration - Laurens Corset and improvers made for this years challenge #4 Under it All
Fabric: 0,5 metres silk taffeta, 1m cotton jean
Pattern: TV E01
Year: 1903
Notions: Busk, spiral steel, flat steel, lace, ribbon, polyester thread, suspenders, two old cotton napkins, batting, more ribbon and more lace.
How historically accurate is it? Pretty accurate, although I am not so sure about the silk beeing flatlined to cotton.
Hours to complete: about 20
First worn: At home - no wearing in public until I have made that yellow dress...
Total cost: about 60€ for new supplies + a lot of stash material


S-Curve Corset
For my new pretty corset I used the TV E01 pattern for a 1903 Edwardian Corset. Lauren of Wearing History has used the same pattern to finish a beautiful corset and improvers earlier this year and I used her pictures and description as inspiration for my own interpretation.
I wanted to have
- lovely lace in two different width
- a big bow
- ribbon covered garters with more bows
- flossing


I just love the corset shape at the hip! And all the bows!

Sicne I was in a hurry (kind of) I usea a simple flossing pattern. I bought the ribbon for the bows to match the colour of the flossing.


Various pads to improve the figure:

I made my falsies using Laurens pictures as guide. After putting them into the corset however, I felt that it just wasn't enough...
So I made the bust cushions included with the corset pattern to have even more fullness. The fabric is from the same napkin as the bust improver. These two little pads really do the trick!
The hip pad was made last year along with the muslin corset. I used leftover silk scraps from one of Moms old blouses. The pattern was included with the corset pattern as well.

  
TV E02 bust pads to go under the girls.

Drawers

 I was really upset with my poor corset progress so I treated myself with another Truly Victorian pattern:
TV E02 pattern for Edwardian Underwear.

I used my beloved cotton batiste to make these drawers. They have a nice wide handkerchief flounce edged with broderie anglaise and some more trimming using the same ribbon colour like the corset bows. Unfortunately I didn't buy enough ribbon so until now only one leg  has the ribbon trimming...

The open drawers close with a mother of pearl button in front and a tie string at centre back.


A Corset Cover

This one is totally ridiculous! Two rows of ruffles with more brodierie anglaise add very much volume to the bust era. I decided against combinations to be able to wear another corset cover with the drawers.

The corset cover is from cotton batiste and closing at the centre front using four buttons.


A Petticoat

For my new petticoat I used a 1901 pattern from Frances Grimble's "The Voice of Fashion".
Since I just inherited lots of bed- linen from my grandma I had enough white fabric to make a petticoat to go with my edwardian outfit.

Two sheets were necessary to sew this skirt. It is a simple pattern, so I didn't make up a paper pattern. For sure that was the reason why I made one wrong cut on the side piece...


I didn't want to cut a new side piece so I just added the missing piece with one of the embroidery stitches on my sewing machine.


For the flounce I used another heirloom from grandma. It is lace I actually found in her stash! And without measuring or even knowhing how much I needed it was just the perfect length! On the centimetre (560 in total)!

I count that as a very good sign! This cotton lace is very old and has some damaged spots, but it gives the special period look I was looking for. I believe that this lace belonged to some kind of curtain originally.
Since the lace wasn't as wide as the lower flounce I used white satin ribbon to create the crossing to the cotton sheet.


The lace really gives the special touch to this petticoat!


For comparison:
without padding...
  

Maybe we'll finally have a yellow dress next week???


Dienstag, 9. September 2014

The yellow dress - or how I ended up making another corset

Oh my! I only wanted to make an easy dress for challenge #17 Yellow, but somehow things are not working out for me... When my Grandma was moving into a retirement home a couple of weeks ago we had a lot of things to sort out including clearing her home. Aside from some nice things to find (all the old photographs and bedlinen to make nice things of and her bobbin lace equipment) it was a rather big mess.
But I found some yellow fabric for the upcoming challenge...
Her old curtains. Her flat had very high ceilings so the fabric has a reasonable lenght.
I am pretty sure it is an all synthetic fibre, but since yellow is not exactly my colour (just like pink back in february) I don't care. It has actuelly a nice touch and is light but floating. And it comes with a matching lining fabric.

So now that I had some yellow fabric, I went back to my pattern pile and searched for something easy-going to make out of lots of yellow curtains.

I chose this dress from Frances Grimble's "The Voice of Fashion"


It is a 1903 Afternoon gown and to me it looked easy enough- only 7 pattern pieces...
I really can't tell anything about the curtain fabric, but it is light, soft and I somehow have the feeling this will be a cotton-candy dress in the end. Yellow cotton candy, of course.


BUT, a new dress always starts with the undergarments... I have made the TVE01 Edwardian corset last year and I sure wanted to go with it to save time and material. But it is from a time when I wasn't able to affort anything and simply made everything out of cheap cotton musling to be able to sew at all... You can Imagine a corset from muslin, can't you?
Not exactly the right thing.
This one
 

The shape is allright and it is fully boned using flat steel, but the fabric is just too thin to do the hard work and I felt that the bust line was too high as well:-(

So I had to make another corset before I could start with the gown...
Usually it is a kind of quick job for me to make a busk front corset so I thought I could pull this one off within a few days and then turn my sewing room into a yellow mess.
No.
I am still working on the corset and it is not behaving to my favour AT ALL. I keep finding me shouting at it, as a matter of fact. I can tell that this is annoying me a lot and I already see me skipping the challenge before I even started on the dress!!!
So I am writing this post to inform you all of my plans for challenge#17 to keep me going and not giving up.

Since I didn't even start on the dress pattern I can at least show you some of the process pictures from my edwarian corset nightmare...

 I used the same white silk taffeta I used for my big hat last week and flatlined it with strong white cotton jean. Both fabrics are from my stash. The pattern wasn't a problem and all pieces went together easily. My troubles started with the busk. I never had any problems inserting a busk. But with this corset I couldn't get the busk nobs to go through the fabric. It took a lot of strenght and patience (which I didn't have) and the result didn' please me. Then I noticed that I forgot to include the lace in the centre front seam, so I had to open up the fresh seams and do it all over again!!!
Arrgh!!!!

Centre front seam with busk, lace and ribbons for the bow.
 The boning channels are made on the inside using twill tape. Every seam is sewn from the right side. I pinned on the inside and stitched on the outside to have perfect seams. Even though this (side-)project annoys me it still should be perfect.
 

 Then the real trouble started: After inserting the grommets on the first side and everything went really neat and pretty I discovered I started from the bottom and not from the top. Now I have a 1" gap from the bottom and a 1,5" gap on top. WTF???
Keep calm I said to myself and then discovered I didn't catch the lage on the top grommet. What is going on with this lace????
I seriously had to undo the top grommet really really carefully (silk fabric after all) and do it again...


At least the finished grommets look ok. Even though the gap on top annoys me. We'll see if I have to add aother grommet later, or if it will work out fine.


The boning and busk are recycled from my old corset. I pre-shaped the side boning, since flat steel isn't that flexible. I made this new corset about an inch shorter thatn the old one and still I had to cut four new steels, because the old ones were too short. I have no idea why...


My Test piece. You know I would never go without;-)
 And here we have a first glimpse on the new corset. Still not finished... I am doing the flossing currently. Then I will ad the binding and some suspenders and can finally start the yellow dress...


I made a quick set of falsies (Bust Enhancers) to go with the corset. Made from two of great-grannys cotton napkins. She even stitched her initials on them, but they are on the side of one of the cushions.


Samstag, 6. September 2014

An enormous hat

I always wanted to make a really big hat ever since I've seen Titanic back in the 90's. Now it finally happened!!! With my previous hat projects I now feel confident enough to try a huge hat and even create a bit of a pattern myself.


My inspiration is this hat from a 1910 issue of La Mode Illustrée. This I found in JoAnne Olian's "Wedding Fashions 1862-1912".

I own the Lynn McMasters pattern for the Titanic hat, but that is an oval brimed one and I prefere a round brim instead.

After I decided to go with a round shape I made a circle from buckram and added millinery wire to the outer edge. Then I formed the wire to lie flat. The object to the left wouldn't work as hat, right?

The I covered the buckram form with one layer of muslin and white silk which I originally bought to make a dress, but after 4-5 years in my stash I have the feeling that this dress is not going to happen...


Millinery wire is very strong!

Sure, I brokea needle before, but never like this!
Usually it's just the sharp edge to come off, but this time it looked rather scary...
A first attempt to decorate

The self fabric bias binding isn't sewn, but glued o the edge


The lining is made from the same silk as well. I will add a sweat band later on.
 
Decorations waiting to get attached
The wires of the roses are wrapped with a strip of white silk to prevent the green from shining through the tulle.


 The tulle isn't white, but sort of ivory. There are 4 metres of tulle gathered on the brim, but not yet attached since I am not quite sure if the material is stiff enough to hold it's shape.

Figureing that out will have to wait a while since I am very busy preparing the HSF challenge #17 yellow...

More on that later so stay tuned!!!

fashion plate