Pages

Dienstag, 18. Februar 2014

1876 Corset - #4 Under it All

Finally challenge #4 "Under it All" is here!!!
I have been waiting for this one ever since I started in the HSF and had a lot of time to think about my project. I am particularly fond of the natural form era and so it is no wonder that I decided to make a natural form gusset corset. I started my project last year, but I never quite finished until last week.
The pattern used is from the dutch magazine "De Gracieuse" which can be seen on the internet.


The Challenge: #4 Under it All
Fabric: 6 metres of cotton jean. Don't worry, the fabric width is only 30 centimetres
Pattern: "De Gracieuse" 2/1876
Year: 1876
Notions: Spoon Busk, spiral steel, steel boning, twill tape, grommets, corset lace, silk threat for flossing, ribbon and lace for the decorative part
How historically accurate is it? My lace and ribbon are both synthetic, but everything else is accurate. I am giving myself 97%
Hours to complete: Many... I couldn't guess
First worn: At home
Total cost: about 60€ for new supplies + a lot of stash material

Bottom left corset of "De Gracieuse" issue 2, 1876

Pattern

Work in Progress...

Since I started last year, there are not too many process pictures, but I did my best to collect some construction pictures.


This corset is a one layer, so the boning can not be fixed between several layers of fabric.

Sewing on twill tape to form the boning channels on the inside of the corset. One tape is wide enough to form two channels.


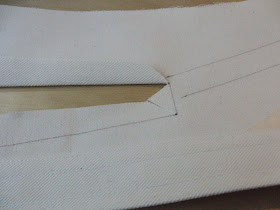
 Preparing the opening for the gussets.
 Usually I would press the fabric at this stage, but the jean is so firm I simply folded it by hand.


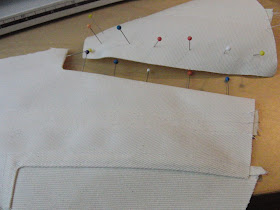
Inserting the gussets. I used pins to mark the seam allowance.


 The most challenging part of the construction was joining the side seams including bust and hip gussets. These seams are supposed to be boning channels as well and since the fabric is so stiff I had difficulties to turn under the seam allowance and still have enough space for the boning. For the next corset I shall have more seam allowance on the gussets.


How stupid can one be, really??? How am I supposed to insert boning into the channel on the middle piece? I must have been sleep-sewing...
God bless historical sewing. One becomes very patient doing such things and so I opened the seams and fixed this, of course.


And here we are... Please excuse the bad selfies to follow...

 I wanted to be flexible wearing this corset, so I didn't use too much boning. This way I end up having some wrinkles, but so be it.


 It is a bit better with the flossing, but surely nor perfect. Since this was my first flossing I used a rather simple flossing pattern, but the outcome is quite nice anyway. The colour of the silk is supposed to be the same as the lace.
P.S.
Flossing takes ages!

 Pinning the lace into place. I found this lovely lace on ebay and purchased 10 metres straight away. You will be seeing more of this...


Attaching the lace was very time-consuming as well. The silk kept tearing apart and since I wanted the stiches to be invisible on the front side I had to do many stitches on nearly every knot on the lace...


First side finished!!!
I am so proud on my flossing!

A detail on the gusset flossing below.


My finished corset on my dress form....                            ....and on me. I have a waist!!!


 With bow...                                                                    ....or without?


The round binding on the bottom is giving a fanatsic shape and is absolutely comfortable! I also like the spoon busk shape very much, although it was a challenge to insert.

My new favorite corset!!

Freitag, 14. Februar 2014

1931 Evening Dress


The Challenge facts:
The Challenge: #3 Pink
Fabric: 3 metres poly satin, 2 metres chiffon
Pattern: 35A from Janet Arnolds "Patterns of Fashion 2"
Year: 1931-2
Notions: polyester threat, zipper
How historically accurate is it? The pattern is, the fabric somewhat, the zipper is not. Lets say 65%
Hours to complete: maybe about 30 hours
First worn: Not worn yet.
Total cost: proud to announce: 100% stash!

Pictures!!!!!


Donnerstag, 13. Februar 2014

Done!

My new dress is finished!!! Finally the pink fabric is gone from my stash and I am happy!!!!

Working on this new dress I remembered where the chiffon in my stash came from (Sorry, no memories on the pink satin...). It happened to be a stola scarf (so basically a square piece of fabric) for a combination of a black skirt and a (yes, really:-)) PINK corset I made in 2004.

10 years ago!

I am afraid this garment didn't survive to be shown to you the way I originally made it. First there was no digital photography in my family at that time and second I altered it slightly.

This is what is left.
The joining seam in the middle of the skirt originally hold a pink piping to match the corset, but nowadays I am using the skirt for concerts where black is required from head to toe...
And my very first corset ever! Containing plastic boning, no busk-opening and probably every mistake one can make on their first corset. It was intended to be the 1880s corset from Norah Waughs "Corsets and Crinolines". The fabrics used were heavy black satin for the skirt and pink silk brocade. I can't remember to have bought a more expensive piece of fabric ever since...


Now, back to the PINK challenge of the Historical Sew Fortnightly.
I have been very busy to finish the 1931 evening dress from Janet Arnolds "Patterns of Fashion 2".

This is what I did:


Frill making. 
I used every scrap of leftover fabric I could find. Then I joined all circles together and hemmed them. Both colours separately, of course.

Starting in the middle of the triangle front panel I placed the frills into place and stitched it.

Any ideas on what to do with the leftover inner circles???


The first chiffon frill.....


...and the finished frill-front-piece of the dress.


The next step was to hem the skirt. For this I used the "rolled hem" foot on my sewing machine.  As I didn't want to buy anything new for the dress I took the only (tiny) roll of pink threat I had. This is the amount of threat left on the roll after hemming the skirt. Phew...


Inside look of the dress, front and back view.


Dress Mess on the floor

Detail view of the inside of the frill piece

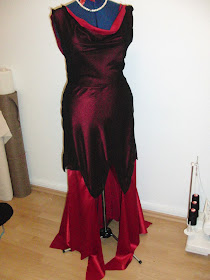
Now I said, that the dress is finished and that is true. But unfortunately every picture I took 10 minutes ago appeared to be rather red than pink. Therefore I will take more pictures in daylight tomorrow and then make the final post on this challenge.

Dress without finished armholes...                                  ...and with self-fabric bias binding. I also adjusted
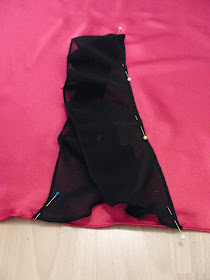
                                                                                        the pointy edges of the chiffon over-skirt.


 Detail of the self-fabric bias binding

Stay tuned for tomorrow!

Sonntag, 9. Februar 2014

Chiffon & Satin

Today I made some good progress on my pink and black dress.
Since I am not keen on writing right now, I let some pictures talk...


I am using my serger for most of the sewing and since I don't have enough pink thread I am using black.


 Some test pieces...                                                           ...and the finished hem on the chiffon skirt. I am
                                                                                         really proud of these corners!


Top and skirt, not sewn together yet...


                                                  Joining top and skirt using my serger.


Pinning the shoulder seam
 Inserting the zipper. The original dress used press studs, but I still had that zipper and no press studs...


 Picture using flash light...                                                            ...and no flash


 Left to do:
1. insert front triangle
2. lots of frills
3. finally joining the shoulder seams...
4. edge the armholes with pink bias strips
5. ad a hook above the zipper
6. hemming